Web Forms is a feature that lets visitors input information directly into a form on your site. You can use it to collect useful information from your site's visitors. For example, you can build a survey form to collect feedback about the usability of your site.
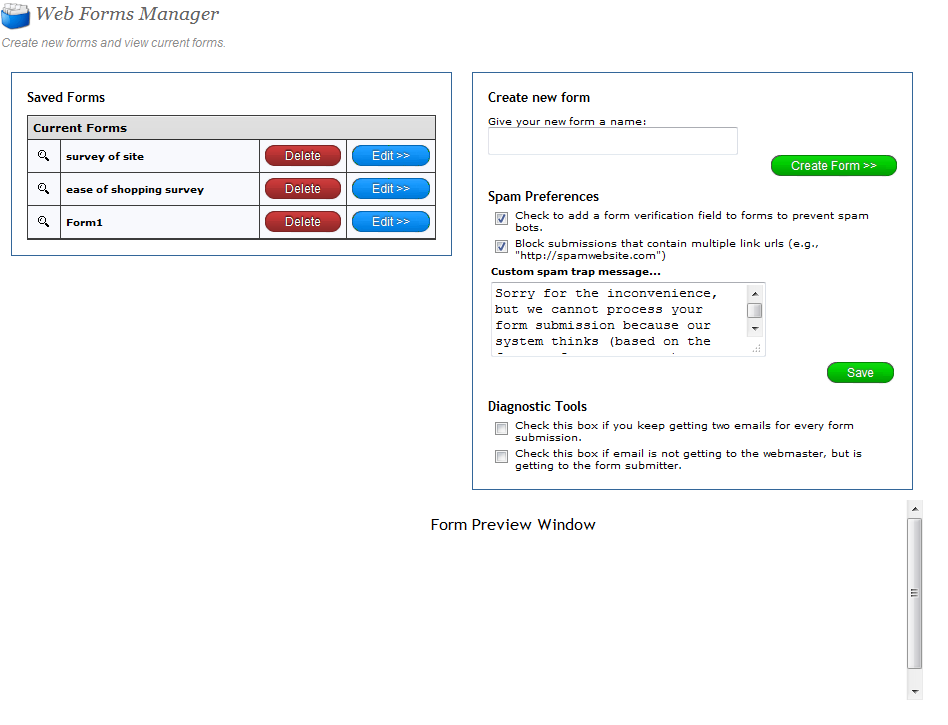
On the forms page, you have the option to create a new form, edit or delete existing forms, and set preferences for preventing spam mail.

Creating a Form
To create a form, provide a name for your form under 'Give your new form a name' and click 'Create Form'. You will be taken to the Add/Edit Fields page.
You can edit the title of the form and its instructions if you click the text in the preview area, and you can also edit the form's fields in this area.
The Revert to Saved button will change your settings back to the way they were in the last save. "Save As..." will allow you to make another save of the form with a new name while keeping the old form intact. "Save Changes" will save the form as it currently is.
When you are finished making your form, you must go to the page editor and drag the Forms item into a row by itself. Then selet your form from the "Available Forms" drop-down menu. You can then decide whether to have the form data sent to your email, or store them in a data table (see Site Data Tables for more information).
Adding Fields
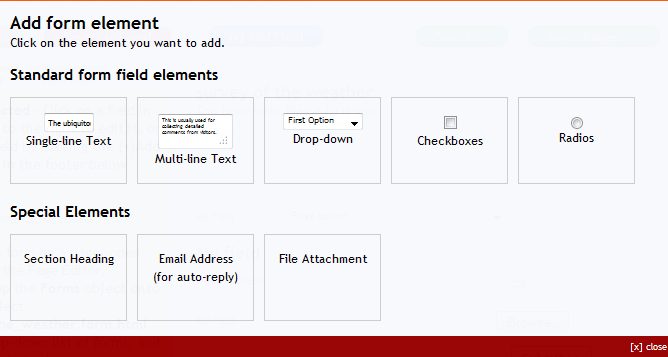
To add a field into which site visitors can input data, click '(+) Add Field'. The next page will give you five standard form field elements to choose from and three special elements.
Single-line Text: Provides a single line area into which users can type in text.
Multi-line Text: Gives additional lines into which users can type in text.
Drop-down: Sets a drop-down list from which users can choose a single option.
Checkboxes: Provides a list of options that users can check off with checkboxes.
Radios: Provides a series of radio buttons that users can click to select an option.
There are also three Special Elements.
Section Heading: Allows you to add a heading and instructions for a new section of your form.
Email Address (for auto-reply): Provides users a single text line into which they can add their email address. A default auto-reply message will be sent to this address.
File Attachment: Lets a user add a file. The file will be sent to the email address under Email the Data to Email Address.

Form Styles
Under the Form Styles tab, which is next to the Field Properties tab, you can edit the way your form is presented.
Editing a Form
To edit an existing form, click 'Edit>>' to the right of the form's name in the Saved Forms box. To delete the form, click delete.
Note: Whenever you make an edit to an existing form, you must save it and go back to the page editor, delete the current form and reload the same form again.